The miracle ingredient your soil has been waiting for
How many beginner gardeners have experienced this disappointment? You plant, you water, you hope—and yet, the garden doesn’t thrive. Faced with meager harvests and spindly flowers, it’s easy to blame yourself. But what if the problem isn’t you, but what’s right under your feet? After years of failures and a few successes, the conclusion is often the same: the garden soil is the real culprit.
Whether the soil is sandy, clayey, or rocky, it frequently lacks essential nutrients and good texture—what experts call “tilth,” or its physical composition. Fortunately, there’s one simple solution to improve any soil—a solution you can make yourself: compost. It’s a mixture of organic ingredients rich in carbon and nitrogen—such as kitchen scraps, coffee grounds, grass clippings, or newspaper—that break down to form a substance similar to rich, dark potting soil.
The Shopping List for Successful Composting
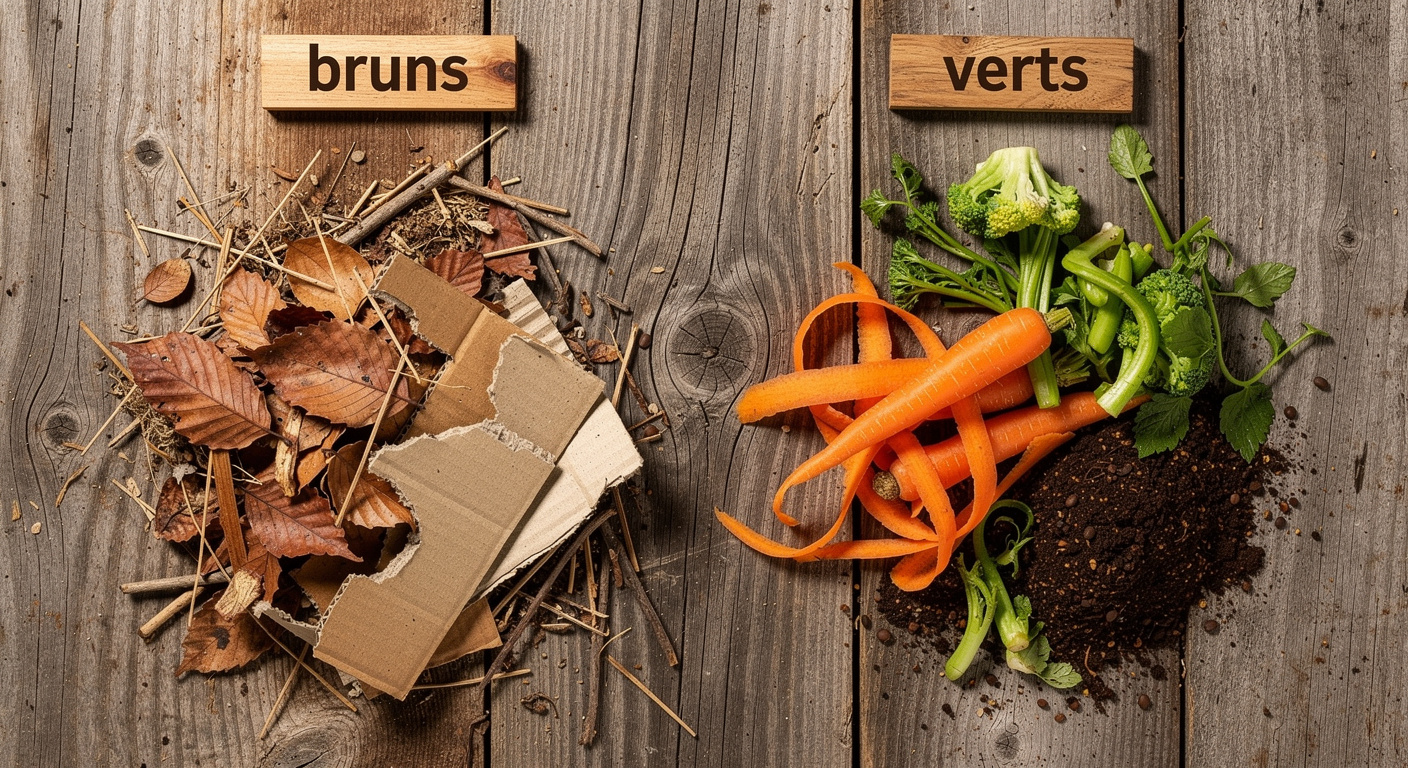
You don’t need to be an experienced gardener or have a large yard to get started. A few tools, a little time, and some organic matter are all you need. You can add just about anything, from vegetable peels to fallen leaves. Compost ingredients fall into two main categories: “browns,” which are rich in carbon, and “greens,” which are rich in nitrogen. To speed up decomposition, be sure to cut them into small pieces before adding them to the pile.
The list of “browns” includes dried leaves, wood chips, twigs, cardboard, newspaper, and untreated paper bags. "Greens" include raw fruit and vegetable scraps, eggshells, grass clippings and plant trimmings, as well as coffee grounds. Be careful, however—certain items should be avoided: animal products, pet waste, fats and oils, and anything that has been treated with pesticides.
As for equipment, make sure to have containers with lids to store your materials. Many people opt for a small bucket on the kitchen counter or in the freezer for “greens,” and a larger bin in the yard or garage for “browns.” You’ll also need a dedicated outdoor space—ideally a well-drained area near a water source. Finally, a large bin or barrel will allow the materials to decompose. This could be a simple plastic bin with ventilation holes, a wire mesh cage, or a rotating composter, also known as a “tumbler.” The latter—a sealed drum that can rotate—is perfect for small spaces. It speeds up the process by retaining heat and aerating the mixture, all without the need for manual turning and out of sight.
Step 1: The Right Balance of “Browns” and “Greens”
Building your compost pile is the first crucial step. The secret lies in layering and proportions. Start by placing a layer several centimeters thick of “brown” materials at the bottom of your bin or composter. This base is essential for ensuring good aeration and drainage right from the start.
Once this first layer of carbon is in place, add a layer of nitrogen-rich “green” materials on top. Then continue alternating layers of browns and greens, as if you were assembling a cake. This layering promotes even and efficient decomposition of all the organic materials.
Step 2: The Art of Moderate Moisture
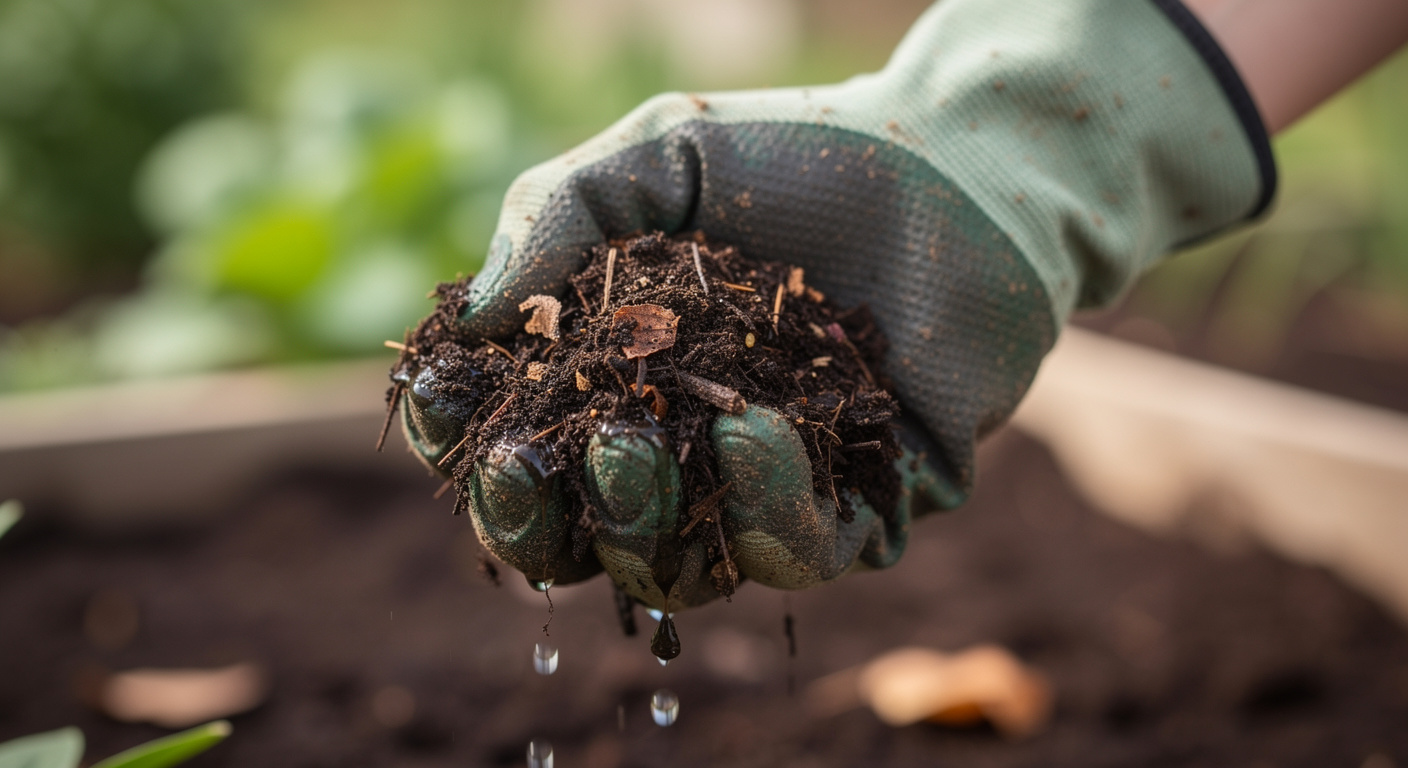
Once your pile is well-structured, moisture comes into play. The decomposition process needs water to function, but it’s all about balance. You should therefore moisten your compost pile regularly. The goal is to achieve a consistency similar to that of a wrung-out sponge: damp to the touch, but not soggy.
Step 3: Patience and Turning—the Keys to Success
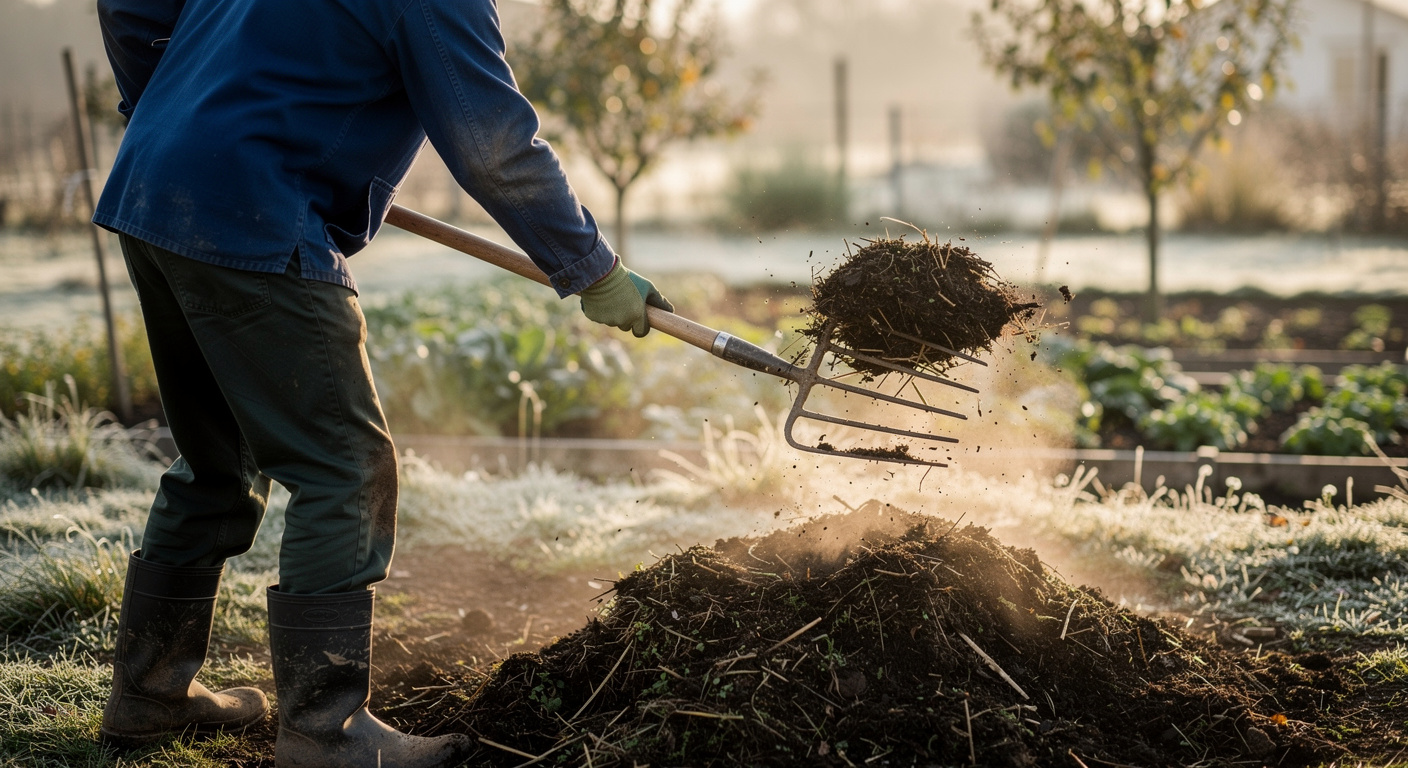
The final step in this process requires a little effort and a lot of patience. Once the layers are in place and moistened, cover your bin. This cover helps retain heat and moisture, two essential drivers of decomposition. Then, it’s time to roll up your sleeves.
Once a week, it’s recommended to turn or mix the compost. This aerates the pile, redistributes moisture and microorganisms, and ensures that all the ingredients decompose evenly. If you’re using a rotating composter, this step simply involves turning the crank a few times.
Depending on your container and weather conditions, the entire process can take anywhere from three months to a year. How can you tell if your compost is ready? It’s simple. The final product should resemble dark, rich potting soil, with a uniform texture and a pleasant, earthy scent. That’s the sign that your “black gold” is ready to nourish your garden.
For those in a hurry: the power of earthworms
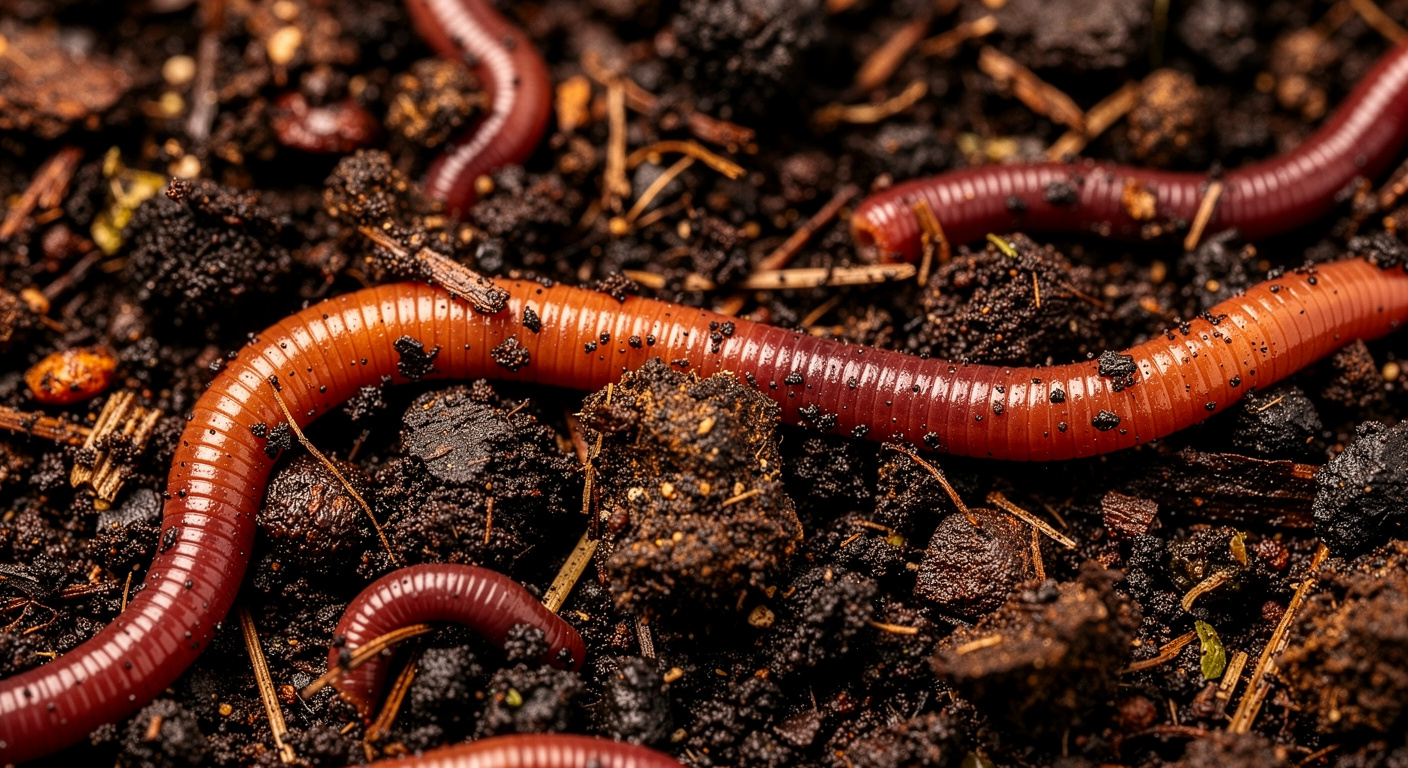
If the idea of waiting up to a year seems too long, there’s a faster method: vermicomposting. This technique uses live earthworms to break down food waste. Not only is it faster than traditional composting—taking about three to six months—but it also requires less maintenance. The only requirement is that you’re comfortable handling worms.
To get started, the EPA recommends one pound of “red wigglers” (Eisenia fetida) for a bin that is 15 inches deep by 25 inches wide. The container must have a tight-fitting lid, ventilation holes, and drainage holes to allow excess liquid to drain out. Fill it about halfway with “brown” materials that have been moistened and aerated, then mix in a few handfuls of soil.
All that’s left to do is place the worms inside, add a first layer of kitchen scraps, and then cover everything with another layer of “browns.” After that, you’ll need to regularly add food scraps and carbon-rich materials. Don’t underestimate their appetite: worms eat a lot!
Source: countryliving.com
The Easiest Way to Turn Kitchen Waste into Gold for the Garden